This is going to be a blog following the research I look into and the photographs that I take and make during this year at University.
What makes a bad photograph? –
Looking into what issues you can face with photographs and what steps you can take to fix them.
What makes a bad photograph?
– Blurred/out of focus – If you don’t get the focus sharp, your images will look soft and blurry.
– Over/under exposed – Even if you just use the built in light meter on your camera, this will go a long way with stopping images from being over or under exposed.
– Movement/shake – If shooting above 1/60th of a second shutter speed (you may be able to shoot on slower if you have practice and can hold very still, this is just an average) the camera will more than likely move and pick up all the small movements that you make.
– Too much contrast/ too little contrast – When you get the settings correct images can still look really flat and dull due to a lack of contrast between the dark and light areas of the image.
– Grain and noise – shooting on a high ISO or with a poor quality sensor will result in a little or a lot of noise in your images. whilst it may not be noticeable to the eye on the camera, when you open the files up on a computer or blow them up during printing it may begin to show much more.
– Colour overcast/tones – This is an issue caused when the camera isn’t set to the correct white balance when shooting.
– File format ( RAW , JPEG) – JPEG is always lower quality than most of the other file formats but is supported by nearly all of them (if not all of them by now), RAW can’t be read by older operating systems and doesn’t work with social medial and most websites.
– Artifacts (JPEG Compression) – JPEG artifacts are caused by compression when an image is saved as a JPEG. Each time an image is saved in this format it’s compressed and “non-essential” data is discarded.
– Pixelated – Low quality images will pixelate when they get blown up as there is no information to fill the areas that are being increased.
– Over editing images (Poorly) – Editing images is all well and good, but if you take it too far they begin to look fake and lose their appeal. They can be over edited and this will ruin the image when taken too far.
– Image Size – Images that are very small can’t be enlarged or blown up very well which means that you will need to be careful what they are being used for. There are charts that can be found online to show the size of the image in comparison to the size you want it printing or displaying.
– Printing Quality – Low end printers, paper and ink will produce low quality prints and wont look as good as high end, expensive prints and work.
How can you fix these problems?
– Use a tripod – This will remove any reason for there to be camera shake or blur, unless the subject is moving.
– Shutter speed – This will help capture moving subjects and freeze them in place if you need to do so, eliminating motion blur, (1/400th and above is the average starting place for freezing motion)
– Focus – If you can’t tell whether the image is in focus or not, then use auto focus. Use live view, zoom in and use the D-pad (Up, Down, Left, Right buttons) to control the area that the camera focuses on.
– Lens choices – Always look at the reviews on lenses and make sure that you’re shooting with well known brands and high quality lenses as a low quality lens will always produce a low quality image, no matter how good you are.
– Film choice/film speed/ISO – Good quality film is a must (Most film these days is good quality however don’t be surprised when £1 film produces £1 quality), always check your film speed (ISO on digital). This is how sensitive the film or sensor is to light. Higher ISO rating = more noise but you can shoot with a much faster shutter speed or tighter aperture.
– Printing – Getting your images printed professionally is always nice but not usually cost effective unless you can get a deal on. Buying a more expensive printer, ink or high quality paper will make a huge difference, but the print settings that you need to print properly will vary with your specs and must be correct to get the best results.
Critical Analysis –
Critical Thinking skills developing effective analysis and argument – A book by Stella Cotterell
Question you should try to answer when analysing images.
Who created the photograph?
Why did the photographer take this image?
Where was the photograph found? Where did you find the image and where was the image originally found?
Was it distributed and to who? Published, Shown in galleries, uploaded?
Whats is the photograph missing?
Was the photograph staged?
Describe –
where?
where?
who?
when?
Analyse –
how?
why?
what if?
Evaluate –
what if ?
so what ?
what next?
Cyborgism –
Neil Harbisson is a Catalan-raised, British-born contemporary artist and cyborg activist best known for having an antenna implanted in his skull and for being officially recognised as a cyborg by a government. The antenna allows him to perceive visible and invisible colours via audible vibrations in his skull including infrared and ultraviolet as well as receive colours from space, images, videos, music or phone calls directly into his head via internet connection.
Harbisson identifies himself both as a cyborg; he feels he is technology, and as a transpecies; he no longer feels 100% human. His artwork explores identity, human perception, the connection between sight and sound and the use of artistic expression via new sensory inputs.
In 2010 he co-founded the Cyborg Foundation with Moon Ribas, an international organisation that aims to help humans become cyborgs, defend cyborg rights and promote cyborg art. In 2017 he co-founded the Transpecies Society, an association that gives voice to people with non-human identities, defends the freedom of self-design and offers the creation of new senses and new organs in community.
This is one of the most amazing things I’ve ever seen and heard
The possibilities presented by cyborgism in the art community are near limitless. As the enhancement of your body through cybernetic implants has not been explored yet outside of a very limited group (possibly not even into the double digits yet) which means that the ideas and work that you can produce from such implants has never been seen before. Cost and social acceptance are the 2 more pressing matters in this field with implants costing thousands. Not to mention the difficulty in getting governments to view your implants as part of you, allowing for visas, passports and citizenship. This stems from people not wanting to accept change and being afraid of things that are different, this poses another problem, which is discrimination. Many people that have become legal cyborgs are heavily discriminated against and pushed out of society. Ethical problems seem to be avoided or brushed under the rug as becoming a cyborg is out of choice and isn’t considered cruel, there are still a lot of doctors that wont perform these procedures because training for them is hard to come by and very rarely used at the moment. I’m looking forward to seeing some of the work that is produced in the near and distant future, especially with the implants that Harbisson talks about.
How to Write About a Photograph –
How to write about a photograph, as a critical analysis or a descriptive writing piece. There are a few ways you can respond to an image or art piece:
Emotionally – This is when you write and explore the emotions that the work makes you feel personally and the emotions that the artist is trying to convey through the work. It may be important to address both sides of this when writing about works of art as they can often differ greatly.
Critically – Explore the art work thoroughly looking at the flaws and areas for improvement, alongside looking at the merits and the strengths that the work displays.
Analytically – Looking at the art piece logically. Do not assume anything and avoid talking about what you ‘think’ or what it ‘might mean’. Once you have done this, you can begin to talk about what the art work is inferring and what the message is. Finally, explain you reasoning for this, telling us what is causing you to think that.
The Inverse Square Law –
The inverse Square Law is something that i have been reminded of quite frequently as a photographer, and should definitely be remembered whenever you are shooting with anything other than ambient light. Studio work especially! A lot of information and detailed explanations can be found online.
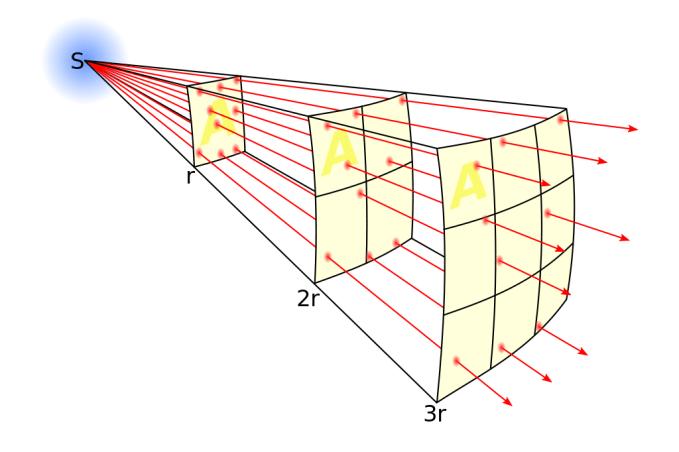
S = Source
r = measured points
This diagram shows the spread of light over distance. The further away you are from the light source the more spread out the light will be, meaning that you will get a more even light that is darker than that of light that is closer to the source. depending on how the light is being diffused will change how the inverse square law operates. honey comb grids will still abide by the inverse square law for example for the light fall off over distance will be much lower because the light is being controlled and directed.
Copyright –
Copyright in photography means that you own an image you created. The law says you created that image as soon as the shutter is released.
The photographer who pushed the button owns the copyright. A photographer will own that copyright throughout their life and 25 years afterwards.
Whether it’s photography on your hard drive, online portfolio, or a post on your Instagram feed, with this ownership, you have exclusive rights to your image according to the Copyright Law of the United States of America. This includes:
- Reproducing your photography
- Preparing derivative works based on your photography
- Distributing copies of your photography to the public (by sale, rental, lease, or lending)
- Publicly displaying your photography
Owning the copyright on your photography doesn’t require any special paperwork, or having the © associated with your image. The copyright will automatically apply once you post your photography online because at that point, it exists in a “tangible medium.” It’s out there, and it’s yours.
Generally speaking, in the UK copyright in images lasts for the life of the creator plus 70 years from the end of the calendar year of their death although the length of the copyright period will depend on when the image was created. That means that images less than 70 years old are still in copyright, and older ones may well be, depending on when the creator died.
An image might have multiple copyright owners if there was more than one creator. An example might be a cartoon or illustration created by a number of visual artists, who then jointly license use to a website owner. This is different from copyright works which contain other, underlying works which are also protected by copyright. For example, if you wanted to use image ‘A’ which also contains image ‘B’, then you would need permission from both owners of image ‘A’ and ‘B’, provided the inclusion of image ‘B’ was not purely incidental.
The Lenses I Use –
This is a short introduction to the lenses that I work with myself and where I have found them to be the most useful. I am a Nikon based photographer and all of the lenses here are Nikon (or will mount on a D7200).
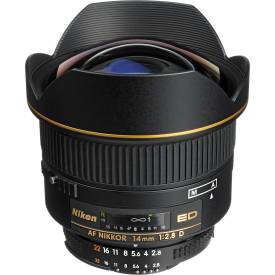
Wide angle lens. This lens has a short focal length but a wide field of view. Most used during landscape photography but can provide some great looking shots wherever it’s applied.
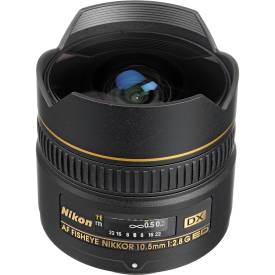
Fish eye lens. Very similar to wide angle lens, but with a much wider field of view, and usually distorts images quite a lot. Great for showing off whole rooms and used occasionally in landscapes but I haven’t used it much and don’t know a lot of photographers that use them regularly.
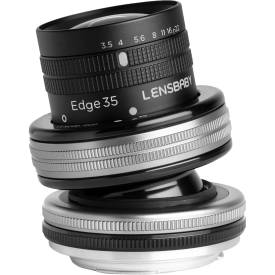
Lens baby. This is an odd lens, it has a very shallow depth of field that can be controlled by tilting and rotating the lens itself. this can help photographers to create toy like scenes. This works better on large subjects like city streets.
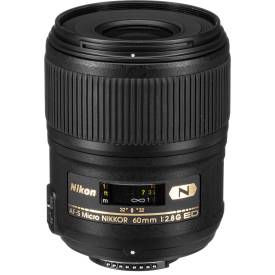
Macro lens. This lens is very useful for photographing subjects very close up and getting into great detail on them. You should be shooting with a tripod nearly all of the time when using a macro lens because of how close you are to the subject. Being so close and so zoomed in means that the slightest movement on your part will make a very big difference in the camera itself.
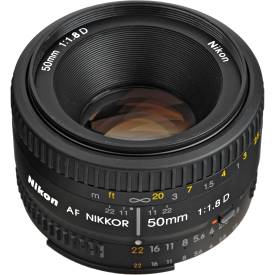
Prime lens. Can’t zoom or really do anything special, its a high quality lens that can be used across the field. Having less lens glasses in it means that there is less distortion in the image. They cant usually accommodate for a very wide aperture lending themselves to nearly all lighting conditions, they usually have the same thread size as most common lenses like the kit lenses, meaning that you can buy 1 filter that will fit across several lenses. These are a personal favourite of mine when shooting landscape as they always produce clear and beautiful pictures.
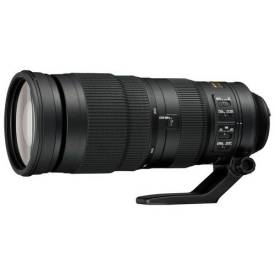
Tele-photo. This lens is used a lot in nature photography for its ability to zoom in on distant subjects without getting close. Meaning that you don’t scare the subject or gives you the ability to get even closer when near the subject already. When zoomed in to the max the depth of field will always be a lot more shallow than when you are zoomed out, meaning that you have a lot more control over the outcome of the image, which is why I have taken to using them a lot in the studio and shooting from much further away. They usually lose some quality the more you zoom in with the lens and the further away that the target is. On top of that, because they have so many lens glasses inside they are a little more distorted than others and suffer from a lower quality.
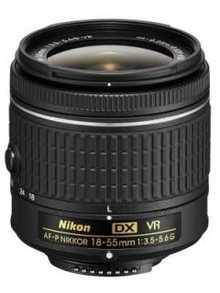
Kit Lens. This 18-55mm lens comes as a default with a lot of camera bodies, it works well enough and will get you buy for a little while but its a good idea to get yourself some much better quality lenses before long. It has no special features and doesn’t excel in any field but its reliable, cheap and light weight, meaning that it’s always good to have one with you just in case. When you start to expand your lens collection you may start to leave it behind and at home more often as every other lens will do their jobs to a much higher standard.
Tripod –

This is a basic tripod with a ball mount and telescopic legs. A tripod is an essential piece of equipment that all photographers have no matter what you’re photographing. When using a tripod it almost completely eliminates shake and camera movement (you can take this a step further and use a shutter release or lock the mirror on some cameras as the smallest movement such as pressing the shutter button or the mirror moving will cause some shake and blur)
The ball mount allows much smoother movement and is very easy to use but its a lot harder to micro manage angles than with a standard head that’s uses 3 arms to control the axis. The pole down the middle of the tripod allows you to raise the camera up even further along with the legs, but this does make it more unstable and when its windy, it may begin to shake your camera and work against you. A lot of people don’t know that the pole can be taken out and turned upside down so the camera is under the tripod, this allows you to get really close to the floor while using a tripod for stability. I use this a lot in the studio to get closer to the floor or closer to the subject on a table or desk when shooting. I like the angles this allows for and it gives you a much wider range of movement when you know about it. Not all tripods support this however.
Shutter Release Buttons –

This is a shutter release button. This will allow you to trigger your shutter on your camera without touching it, from a good distance away. which is good if you have to be hands on with the set that you’re photographing but have the camera standing on a tripod, this is also a lot better for long exposures, but wired shutter buttons work just as well for that.
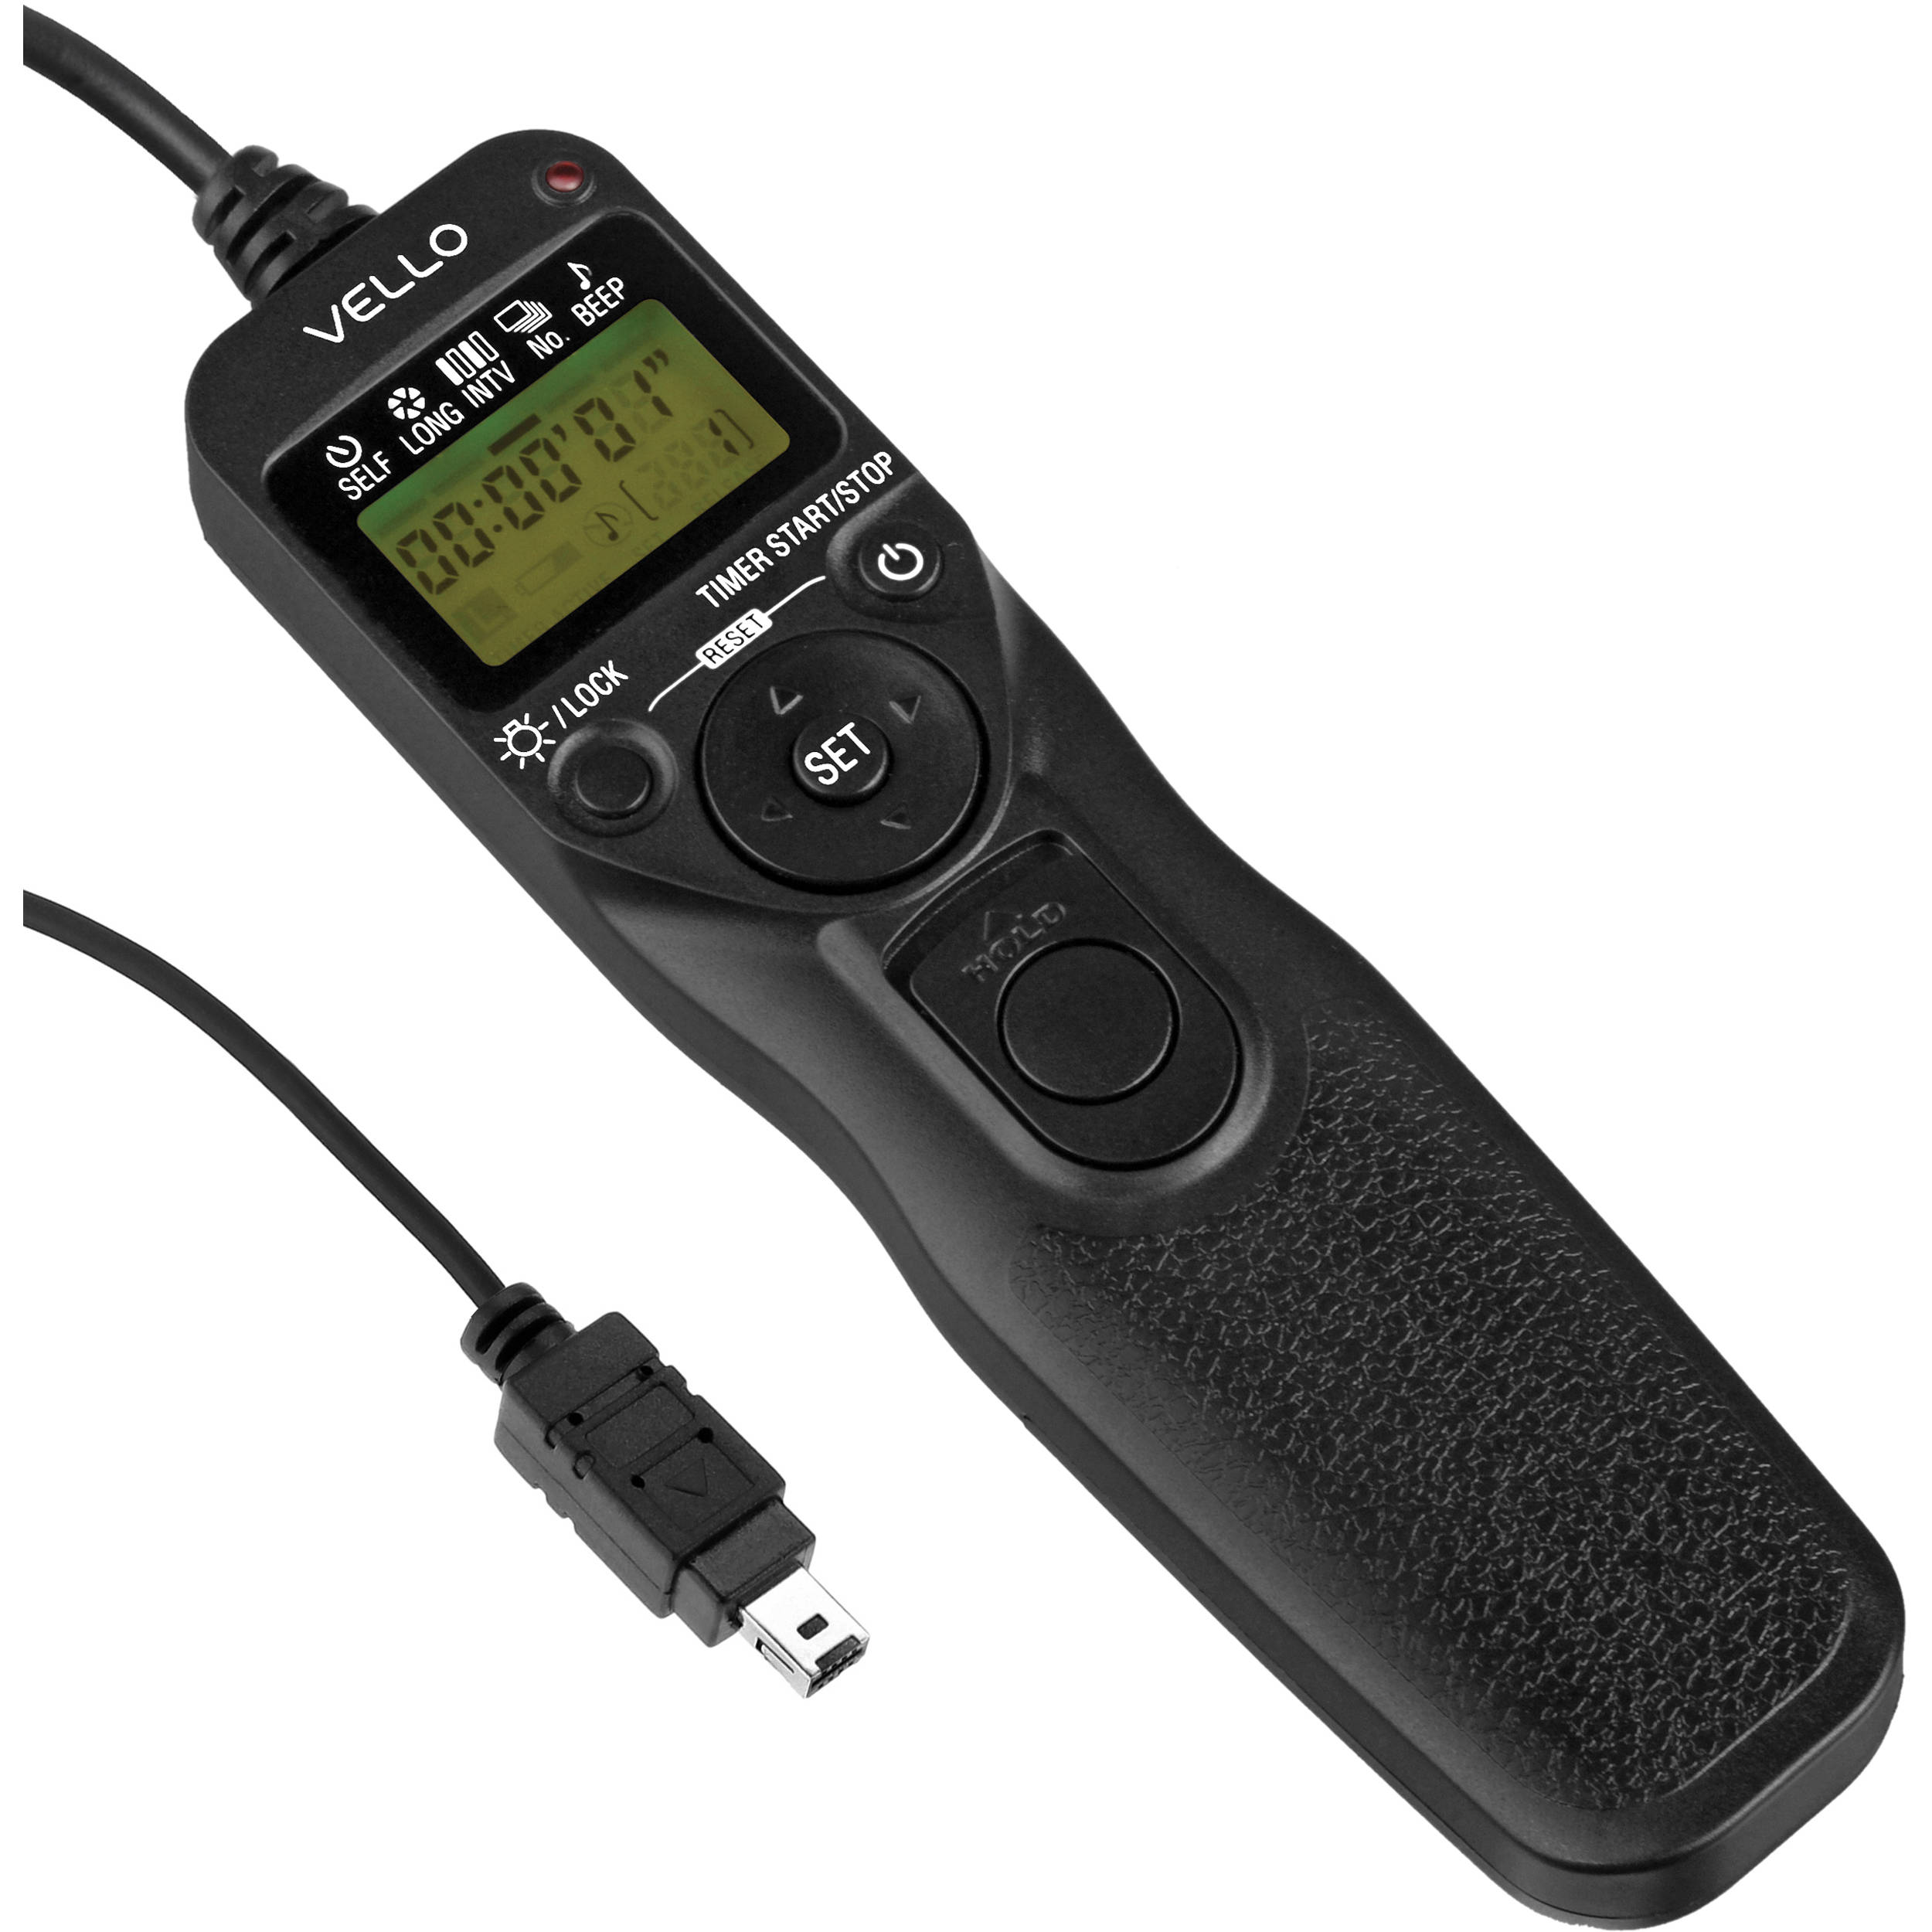
This is an Intervalometer, which is a step above the shutter release button that I spoke about before. They give you the ability to set a timer on the shutter, depending on the settings of your camera. You can set a 30 second exposure on the camera at f1.8 and ISO 800 (The settings I used last time I was doing start photography), and then set the remote to take a photo every 30 seconds, which gives your camera more than enough time to process the image, and then it will automatically take another photo. Meaning that you can walk away and sit in your car, house or wherever to keep warm during the night while your camera does all of the work. This is all that I have done with it so far so i haven’t learnt much more about it but i wouldn’t be surprised if there were more settings and uses that i am unaware of.
Dumfreis Galaxy Stars –
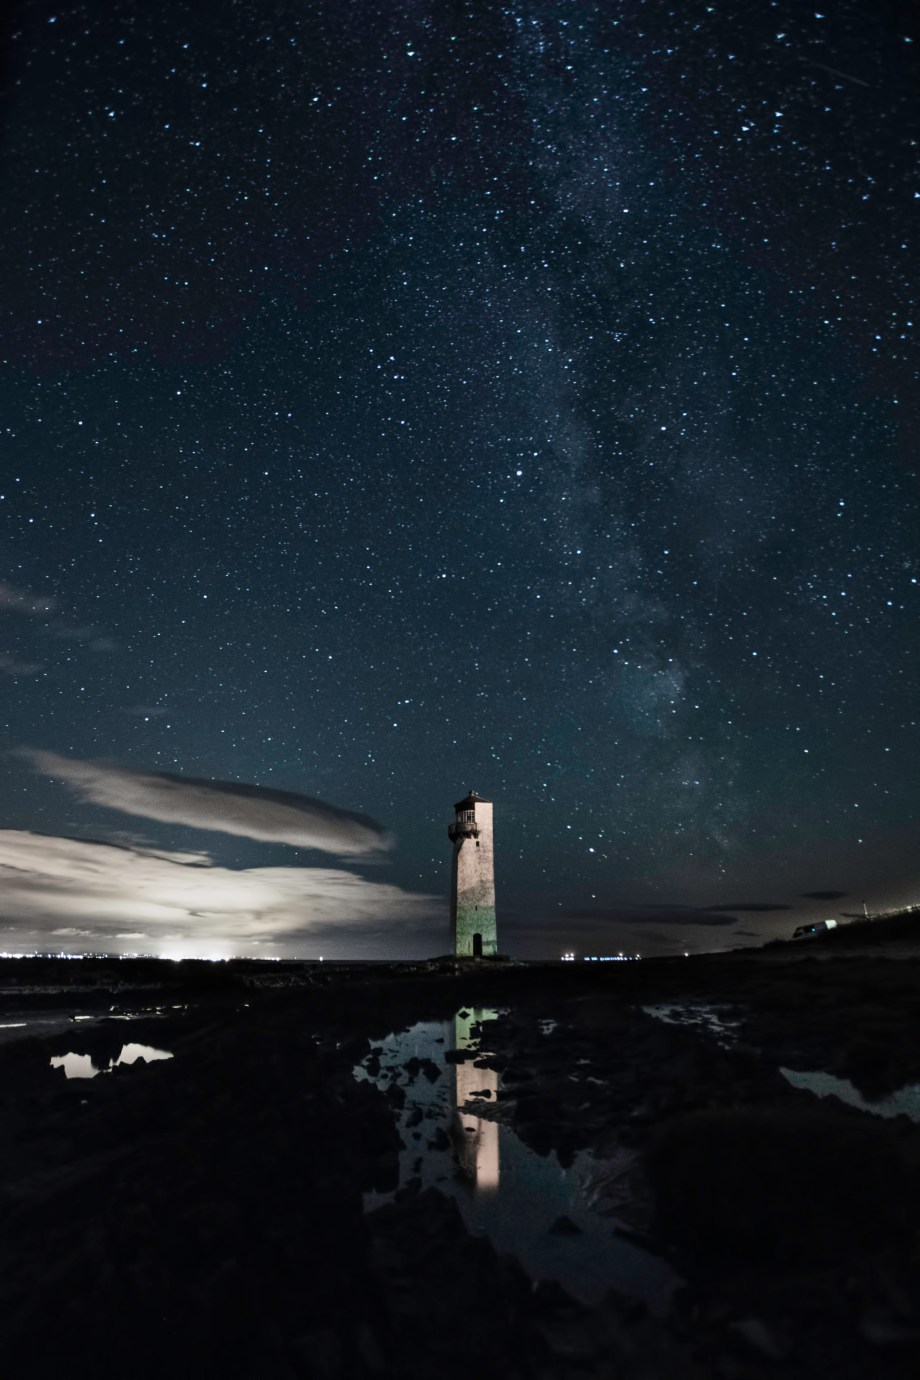
This is the final image that i have edited from my shoot in Scotland at the Dumfreis Square Lighthouse. This was the first major shoot that i have done with Astrophotography and it was in the company of professional photographer Ben Bush who was giving me support and tips into getting the best results from my night photography. While I am very happy with the results of this shoot i would like to get the chance to go back up to Scotland for another shoot with the lighthouse and the arm of the Milkyway galaxy but there it’s only visible at a certain time of the year. As you can see cross the rocks at the bottom of the image, i have lot a lot of information in the image because it had to be uploaded to the blog as a JPEG, so information that is too detailed, or doesn’t fall within a tolerance is discarded to save space, in this case WIX will compress the image again after i have compressed it so they can save space on their servers and it will take less time and resources to open the web page. There is also a lot of noise in the dark ares and stretches of marching colour because of the age of the camera that i was shooting on and the ISO that it was set to.
I would have liked to find a bigger body of water to get the reflection of the lighthouse but i was starting to get a little too far away from the tower when i was finding the bugger ones and I found my way onto the sinking sand. Which is a huge part of night photography, be very careful of the area that you’re going to be shooting in and around, and just as importantly, be aware of the other people around you as to avoid ruining their shots if you turn your light on to move around. I was shooting with Ben and my dad, so we had to call out when we wanted to turn the light on to make sure that they wern’t shooting themselves
Lens Warmer –
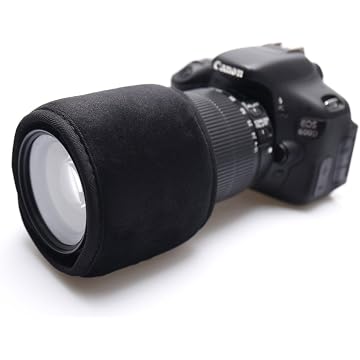
This is something that Ben Bush (https://benbush.photos) introduced me to while we were shooting. It keeps the lens of the camera warm during the night time and helps to prevent the build up of dew and condensation on the lens when it gets cold. This means that you don’t have to keep wiping the lens off and risking shaking the camera. It also means that you can leave the camera out and shooting without having to be near it all of the time keeping watch.
Jan Groover –
![]() http://janetbordeninc.com/artist/jan-groover/
http://janetbordeninc.com/artist/jan-groover/
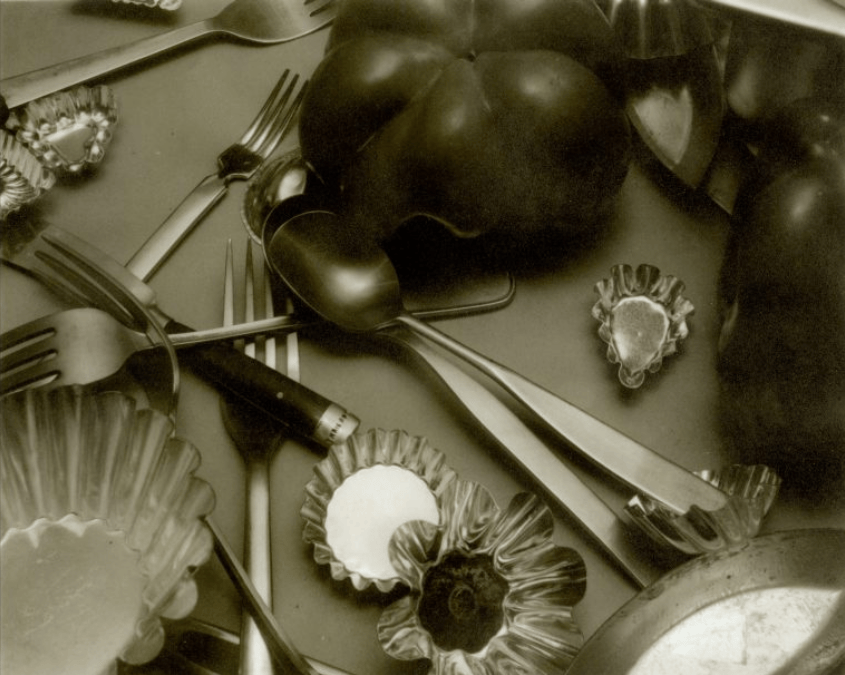
Jan Groover (1943-2011) was an American photographer known for her kitchen still life photography. This particular image of hers looks at what seems to be a dining table covered with utilitarian objects, tomatoes and peppers. This isn’t a visually attractive image to start with, the colour of the print is dull and faded but that seems to bring out the contrast of the subject. The reflections in the metal doesn’t give you any indication to the rest of the room, and doesn’t have the reflection of her or the camera in the shot. The reflections on the smaller object in the bottom centre of the shot creates an abstract and unique pattern. It looks like some of the darker parts of the image are worn and faded, losing the detail in them, and showing the noise of which adds to the character of the image. This looks like cutlery that you would find in a normal working class house, they aren’t all a matching set and they aren’t polished or stainless steel like most, so they are more than likely old and well used with one or two being lost or broken over time. Everything looks like it has been just dropped onto the table or left out after cleaning, but on the other hand they are too well place and perfectly laid out to be totally random. If i had to guess i would have to say that this is all set up but influenced by the chaos of a kitchen.
My Work –
The work that i have been producing during the last projects (place and book) has focused on the aesthetic of photographs, creating a visual image that focuses on what people like looking at. This is something that i have been focused on for a long time as i can’t keep my attention on concepts and just get bored. I feel like all of the concepts that interest me for an hour or so have been done to death or they have been shouted about so much on social media and on the news that everyone can only see them in one of two lights. This nearly always creates a split in your work for people that will like it and the people that will hate it because of the concept that you choose. Likewise if you choose to throw away the concept and focus everything on the beauty and looks of the image, it opens the door to allow everyone or a much bigger percentage to like the work that your are making. On top of this, the things that interest me and that I would consider “concepts” that interest me aren’t ones that can be photographed easily, and certainly not without a lot of funding. I have been to over a dozen countries and hundreds of different towns, cities and areas whilst travelling and i have found that nearly every country is totally different from the next, no two countries are the same, be it that the culture changes but the architecture is the same as another, or the cuisine changes and the landscape is shared with another, or 3 countries share a border but their climates oppose each other. Then you have single countries with vast cultures and landscapes within them that they feel like a fantasy world (Special shout out to Japan). This is what i want to find and photograph, I don’t care about photographing the touristy places and cities although i visit a lot of them and will do so regardless when i visit them, but i prefer to find the hidden gems of the countries and see them. Gaming is a huge passion and hobby of mine, and its safe to say my life may as well be stored on a hard drive, but photographing gaming poses so many problems with the stupid tunnel vision society that gamers like me have to deal with. “gaming makes people violent”, “gaming is a waste of time”, “go and get a real job”. Producing photographic work that doesn’t provoke mindless comments like this is near impossible these days because of how blind people are to the reality of what gaming really is. Gaming is a release and an escape from every day life and stress, greatly improves hand eye coordination, encourages your brain to work faster and helps with focusing on a single task. This is very hard to capture on camera without looking like an eSports commercial or sparking arguments and debates every time you show people an image. I love technology and how advanced its becoming in recent years but I don’t have as much pleasure photographing it as i do learning about it and almost all of the really interesting pieces of tech that i would love to see costs tens or hundreds of thousands of pounds, which is a little out of my price range. While I’m sure there are concepts and ideas that i can work on photographing and base bodies of work around, the fact remains that its just not what i enjoy doing and has a bad tendency of putting me off photography and pushes me into a rut where i stop working and don’t produce anything until i am running out of time and have to throw something together.
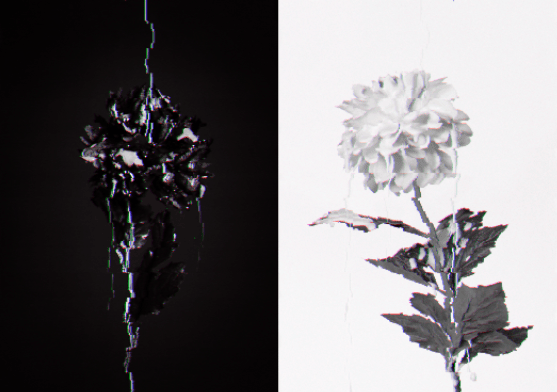
you can easily add concepts to my work:
The digitisation of nature, Crossing the line between technology and nature, Blurring the lines of what is real, Etc.
Even if i give a concept for this work, people will still see what they want. If my work gives you and idea, or invokes a feeling, then that’s a bonus on top of being visually inspiring.
Spiral Light Photography –
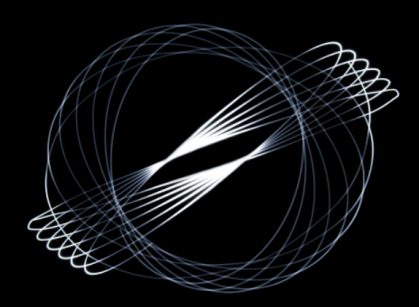
Spiral light photography is something that I have only started looking at since being in quarantine, along side some other fun and super simple photography ideas that I have come across on ExpertPhotography.com. Spiral light photography is very easy to set up and only requires a low power torch or light source and a length of string that you can hang from the roof. set up your camera directly under the light source, make the room as dark as possible (isnt needed but it helps). A tripod is recommend but again isnt needed, and then just push the light around in a circle, or an elliptical shape, swinging over your camera. Make sure your camera in on Bulb and experiment with the aperture that you are using to get the best exposure from the torch. You can hold the shutter open for as long as you want and the longer that you have it open the more movement that you will get.
Bubble Photography –
Another of the very simple techniques from Expert Photography. Mix 3 tbs of glycerine, 3 tbs or soap (washing up liquid or hand soap) and 1/2 cup of water. Leave it to rest over night and the following day you can use a straw to gently blow bubbles into the mixture. Start out with a small one and then poke the straw into it, and blow gently until it touches the edges of the container. it will pop a few times before you can get a stable bubble, but when it stop popping you can blow it even bigger and line the camera up with it. I used a 140mm lens with a speed light about 6 inches above the bubble and a large circular diffuser in front of it to light it. with a black background behind the bubble. You will need to play with the settings for your own, but i used the flash set to 1/32, F10 and and 1/250th shutter speed with an ISO of 100. 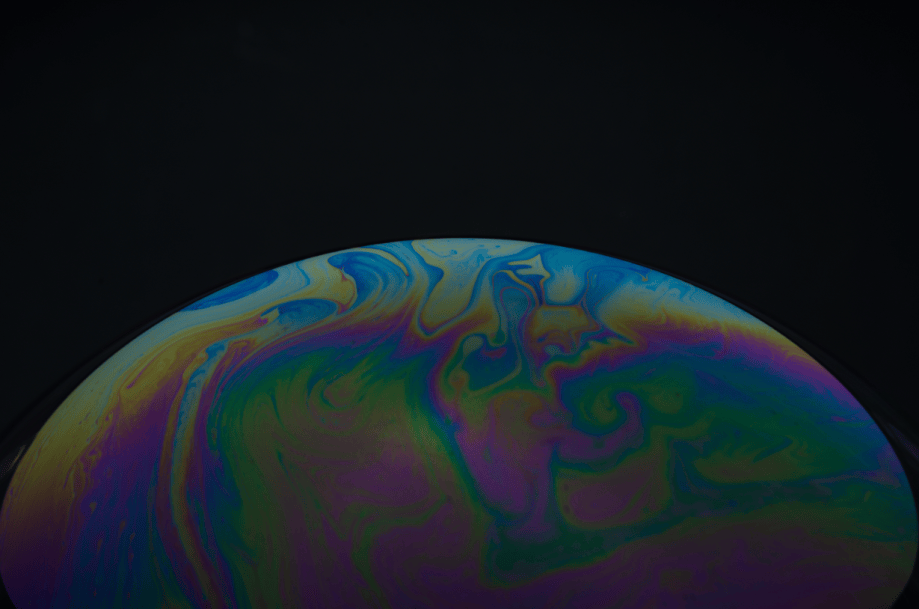
This is one of the first images that i have taken. It works well but the very shallow depth of field is hard to work with in such a small space.
Water Splash –
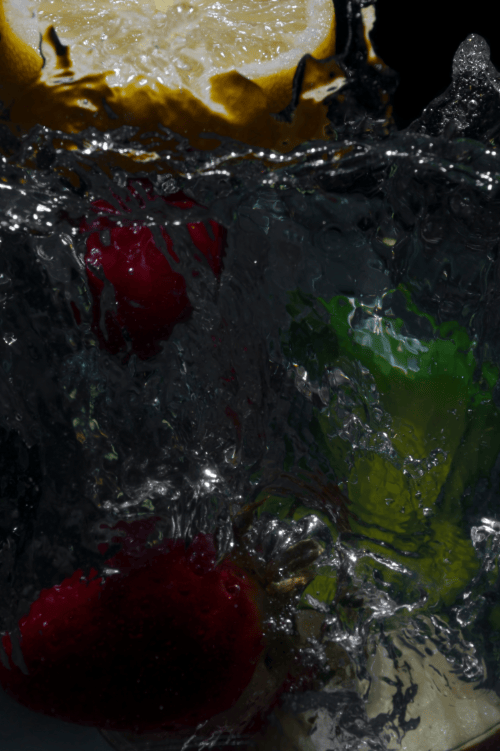
Filling a vase or clear tub with water and dropping fruit into it. That’s all there is to this one. Placing the flash above the water directly. line the camera up so the water line is directly across the middle of the the shot. Set your camera to 1/250th (1/200th in some cases) ISO 100 and match the aperture to the power of the flash that you’re using. I used a wired shutter release as its easier to drop the fruit and time the shot when youre using a shutter release. Try mixing different fruits together for colour matching and the best results. practice and keep testing things out so until you find something that works for you. you don’t need to stop at fruit either.
Exhibition Visits –
Tate Liverpool – Constellations was an exhibition of mixed artists and art, ranging from paintings, sculptures to photographs and videos. The exhibition was made up of several ‘constellations’ with a piece of art in the centre of each constellation which then takes you on a journey of links to how the art influenced other artists and work. The main piece was accompanied by a word cloud of words that could be associated with the central art and all the connecting works. Whilst some of the links were easy to recognise others were not obvious in the connections. Generally the painting and sculptures included would be described as modern or contemporary but the photography tends to be more socio-political or photo journalism rather than truly artistic for enjoyment. The idea behind the exhibition is really good but I thought some of the links were not a clear as I would expect.
BlueCoat Liverpool and Open Eye Gallery – Beautiful World Where Are You. This was a 15 week artistic event that was spread around Liverpool including exhibitions in both Bluecoat and Open Eye Gallery. One of the exhibitions in Open Eye was a social photography collection. In a similar documentary style to Martin Parr this was interesting not for the photo content but more how the project initially started to document an area of Liverpool but became a way to revitalise the community spirit between the residents. The BlueCoat exhibition was very different even though it was part of the same event. I don’t find the venue easy to walk round and view the exhibits due to the building layout.
The Photographers Gallery London – as a purpose built gallery for photography this is a great layout for viewing photography artists. I have made a few visits to this gallery and they promote and display more varied artists than seen in many galleries, not concentrating on journalism photography but more artistic content which is great to see. One that stands out is Paul Hart landscape collection Poetry of Place. Very simple black and white images of british countryside that needed no explanation.
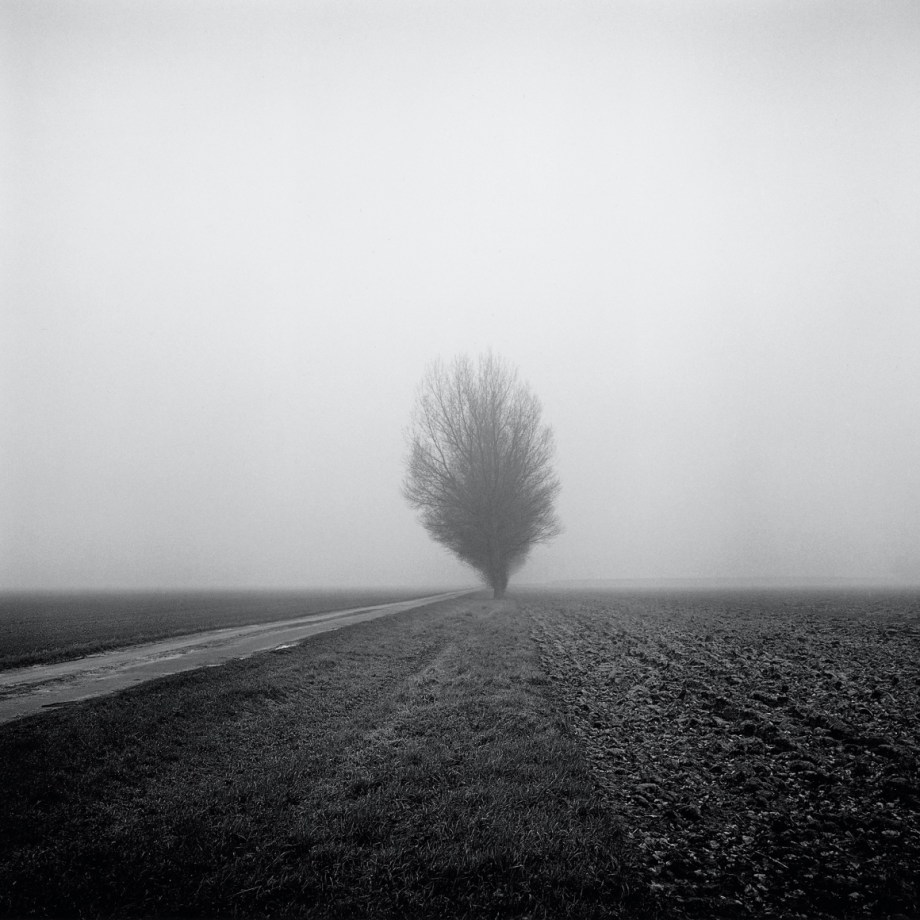
Hurn’s End, 2016, from Drained © Paul Hart
I took a similar image in a moment of just ‘seeing the shot’.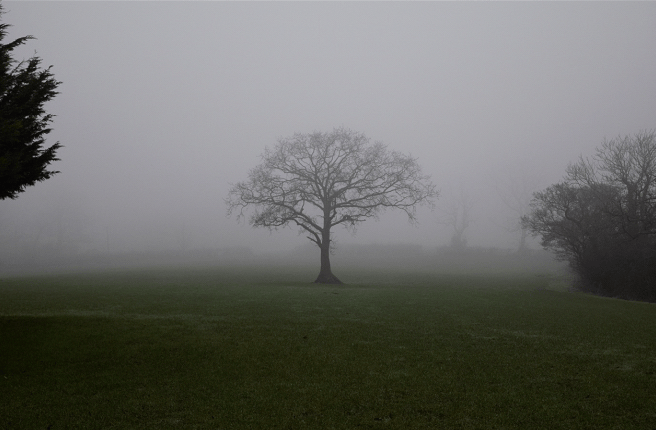
Victoria & Albert Museum London – Into the Woods: Trees in Photography exhibit was in a small room but filled with fascinating photographs ranging from botanical records to artistic images. The exhibition was centred on trees being a source of inspiration since before photography. It did included works by known photographers like Ansel Adams but it concentrated more on how trees had been used in photography rather than specific artists. For such a small collection I spent a lot of time looking through the images.
Manchester Central Library – Various exhibitions. This is a place that surprised me the first time by having a photographic exhibition, but they regularly have a new display. It is easy to get to and small enough to just pop in and spend a few minutes looking at the latest display. The theme of the exhibitions is usually connected to Manchester, but with wider appeal including Manchester Airport works by Shirley Baker to Stephen Wright, who photographed The Smiths.a
 HouseOfMadness